


Arknights: Endfield launched on January 22, 2026, and immediately established itself as one of the most ambitious gacha games to hit PC and console in years. Hypergryph’s spinoff combines action RPG combat, open-world exploration, and a surprisingly deep factory automation system that borrows liberally from games like Factorio and Satisfactory. Whether you’re a longtime Arknights fan or completely new to the franchise, this arknights: endfield guide covers everything you need to dominate Talos-II.
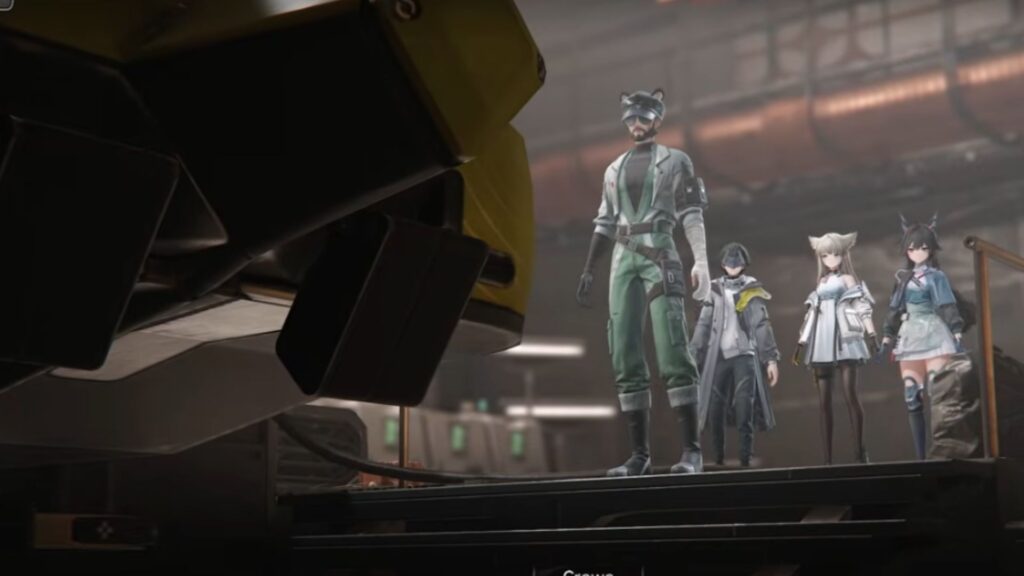
The game throws a lot at you from the opening hours. You’ll manage a four-operator combat squad, build sprawling production chains, explore multiple interconnected regions, and navigate a gacha system with over two dozen playable characters. The learning curve is steep, but the payoff is substantial once everything clicks into place.

I’ve spent over 100 hours exploring every system Endfield has to offer. The factory confused me initially. Team building felt overwhelming with so many operators competing for limited resources. Daily activities seemed endless without clear prioritization. This guide distills that experience into actionable knowledge so you can skip the confusion and focus on what actually matters for progression.
The structure follows the natural flow of how you’ll engage with the game. Starting with free rewards that give your account a head start, moving through factory fundamentals that generate passive resources, covering team building and operator evaluation, explaining daily routines that maintain steady progression, exploring late-game regions with new mechanics, and finally diving into combat rotations that maximize your team’s damage potential.
Each section connects to deeper coverage for players who want comprehensive breakdowns rather than overviews. Think of this guide as the map showing where everything is located, with paths leading to detailed explorations of each destination.
redeeming codes and claiming free rewards
Jumping into a new gacha game without grabbing every freebie available is like leaving money on the table. Hypergryph has been generous with launch promotions, offering gift codes packed with premium currency, upgrade materials, and enough pulls to give your starting roster a serious boost. The catch is that these codes have expiration dates, and several launch promotions already disappeared at the end of January 2026.
As of February 2026, two codes remain active. ENDFIELD4ALL provides 10,000 T-Creds plus upgrade materials and works across all platforms. ENDFIELD4PC offers 13,000 T-Creds with additional combat records but only functions on the PC client. If you play primarily on PC, redeem both codes since they stack. That’s 23,000 T-Creds combined, which translates to meaningful progress on operator upgrades and gear crafting.
The redemption process requires completing the Cold Start prologue first. Once you gain control of your character aboard the Dijiang, pause the game and open Settings. Navigate to the Platform and Account tab, find the Exchange Code option, and enter each code individually. Rewards go to your in-game mailbox, which unlocks after defeating the first group of Aggeloi in Chapter 1.
T-Creds function as general currency for shop purchases and crafting recipes. Running low creates annoying bottlenecks when you’re trying to push through mid-game content. The Advanced Combat Records provide experience for leveling operators. Arms INSP Kits feed into weapon enhancement. None of these rewards are game-changing individually, but everything compounds when you’re grinding through the early progression curve.
The combined value from active codes plus login bonuses and milestone achievements adds up to roughly 135 pulls across different banners. Patient players can hit pity on multiple featured banners within the first month without spending real money. Burning pulls on standard banners when limited characters are weeks away leads to regret that stings for a long time.
New codes typically drop through official social media channels, livestreams, and collaboration events. Following the Arknights: Endfield accounts on Twitter and YouTube puts you in position to grab promotions the moment they’re announced. The community subreddit aggregates codes within minutes of official releases, often with confirmation that they actually work.
For the complete list of working promotions with step-by-step redemption instructions, check out the full breakdown of all active Arknights: Endfield codes updated for February 2026.
understanding the AIC factory system
The Automated Industrial Complex is where Arknights: Endfield diverges most dramatically from typical gacha games. This factory system generates resources needed for gear crafting, consumable production, and regional development progression. Ignoring it isn’t an option if you want to avoid spending real money on materials, but mastering it doesn’t require engineering expertise either.
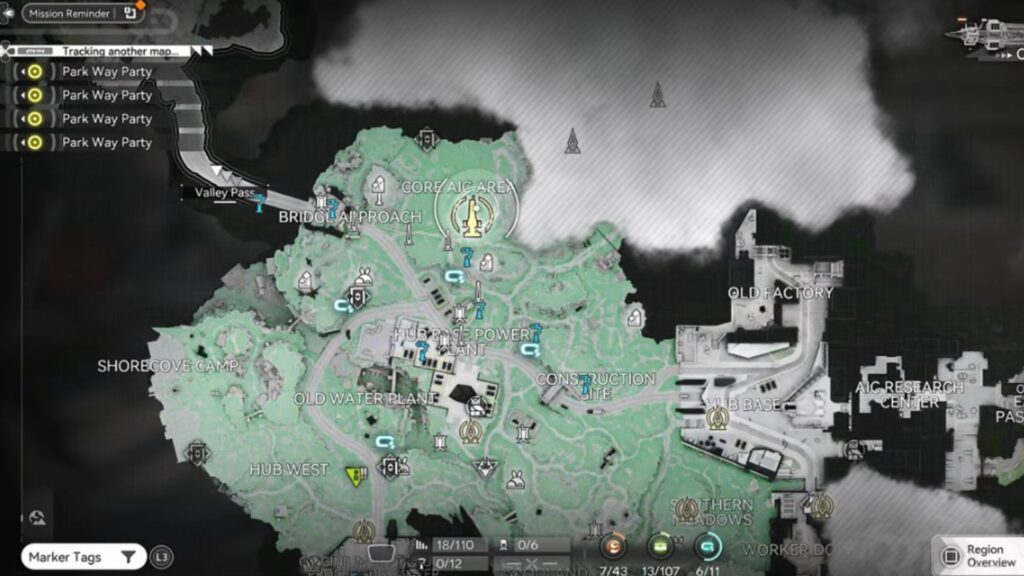
The core loop is straightforward once you understand the basics. Extract minerals from nodes scattered across regions. Refine those minerals into components through processing machines. Combine components into finished goods. Sell those goods at regional outposts for credits and Stock Bills. The complexity comes from scaling production efficiently and managing power consumption as your factory grows.
Three mineral types form the backbone of all production. Originium is brown and the most basic, available from the earliest regions. Amethyst is purple and unlocks mid-game recipes requiring more sophisticated processing. Ferrium is blue and necessary for late-game content with the highest material requirements. Each mineral requires specific extraction equipment and feeds into different production chains.
Power management becomes critical as your factory expands. Every machine, extractor, and processing unit consumes electricity displayed at the top of your screen. When consumption exceeds generation, your entire production shuts down until you restore balance. Green batteries made from Originium Powder and Amethyst Components restore capacity when fed into thermal banks. Blue batteries substitute Ferrium for Amethyst and provide significantly more power per unit.
Extending your electrical grid requires relay towers placed every 80 meters along cable routes. From your main base, run cables toward mineral deposits, placing towers to maintain connection. When you reach a deposit area, connect cables to electric pylons that power any structures within their radius. Mining machines placed on mineral veins begin extraction automatically once powered, sending resources directly to base storage.
Early game production focuses on simple chains. Originium Crust requires only a Refining Machine connected to your base output, producing materials that sell for one credit each at regional outposts. Amethyst Parts need a Refining Unit followed by a Fitting Unit. Industrial Explosives combine Aketine Powder with Amethyst Components through a Packaging Unit, providing the materials needed to break red rock obstacles blocking exploration paths.
The game provides tutorial simulations that unlock blueprints for many common production chains. Completing the plant unit simulation rewards an infinite seed loop blueprint that produces Buckflower or Aketine perpetually once established. These automated loops eliminate manual farming that would otherwise consume hours of exploration time.
Community-developed blueprints compress the learning curve dramatically. The import system lets you copy entire production chains by pressing F1 in AIC mode, navigating to Shared Blueprints, and pasting code strings. Early game setups fit in limited space with basic materials. Mid-game chains incorporate Buck Capsule production for regional trading. Late game factories can produce 18 high-tier items per minute using fully expanded PACs and multiple depot buses.
I wasted my first three days trying to design everything from scratch before swallowing my pride and importing community solutions. My factory output tripled overnight. The developers included the import system because they know most players don’t want to become amateur industrial engineers just to craft batteries.
For optimized production chains covering every progression stage from initial landing through endgame mega-factories, the complete collection of best Arknights: Endfield blueprints provides import codes ready to drop into your AIC.
building effective teams and understanding operators
Arknights: Endfield features over two dozen playable operators divided across four elements: Electro, Fire, Physical, and Ice. Nature exists as a fifth element but primarily supports other team compositions rather than forming standalone squads. Each element has distinct team building requirements and varying levels of accessibility for players without premium characters.
The gacha system makes smart investment decisions critical. Pulling the wrong character burns through premium currency and leaves you with someone collecting dust forever. But tier lists only tell part of the story because team synergy matters as much as individual power. A character ranked highly in isolation might underperform without the right teammates supporting them, while a lower-rated operator becomes irreplaceable within their specific composition.
Electro teams are the most free-to-play friendly option available. The entire core consists of four and five-star operators, making full optimization achievable without gambling on six-star pulls. Perlica comes free at game start and applies electrification more consistently than any other character. Arkite generates SP as a battery while amplifying electro damage. Abiwena serves as the main DPS, dealing massive damage by recalling spears stuck in electrified enemies. Gilberta or Antal fill the fourth slot as damage amplifiers.
Fire teams center around Laevatain, a six-star striker with the highest AoE damage in the game. Her empowered skill requires absorbing four fire stacks from teammates, making characters who apply fire consistently essential partners. Wolfgart solves this problem completely with rapid stack application through his skill and combo. Akuri provides SP generation while contributing additional fire stacks. Ardelia brings healing alongside corrosion application that triggers Laevatain’s combo for automatic stack gain.
Physical teams mix with ice mechanics for freeze-shatter synergies. The Endmin protagonist functions as a strong physical DPS capable of applying crush to consume vulnerability stacks for massive damage. Chen Qianyu applies those stacks while contributing sub-DPS damage through her ultimate. Premium builds add Progritnik for superior SP generation and Lefang for physical susceptibility, though free-to-play alternatives like Stella provide workable substitutes.
Ice teams feature some of the highest single-target damage in the game through Yvonne, whose ultimate transforms her into a pistol-wielding executioner unloading devastating sustained fire against frozen enemies. Last Right offers an alternative ice DPS with combo-based burst and arguably the highest ultimate scaling available. Shai heals while amplifying ice and nature damage. Florit enables Last Right specifically by triggering combos that apply third ice stacks for her detonations.
Team building priority should focus on one strong composition first rather than spreading resources thin across multiple elements. Electro provides the safest entry point for new accounts due to accessibility. Fire and ice teams perform better at their ceilings but require premium investments to reach full potential. Physical compositions offer flexibility but demand understanding of the vulnerability and crush mechanics to maximize output.
The operators you already own become dramatically more effective when placed in synergistic compositions. A complete team outperforms a collection of unsynergized high-rarity characters every time. Understanding which operators fill which roles within their element prevents wasted resources on characters that don’t improve your actual progression.
For detailed evaluations of every operator including role analysis, team synergies, and investment priorities, the comprehensive Arknights: Endfield tier list ranks all characters based on real combat performance rather than theoretical potential.
daily activities and reset times
Arknights: Endfield requires more consistent engagement than most gacha games, spreading essential activities across combat challenges, factory management, exploration routes, and relationship building. Missing a single day won’t tank your account. Missing a week creates a gap that takes real effort to close. Understanding which activities matter and when they reset prevents wasted time on low-value tasks while ensuring you never miss critical resource windows.

Daily reset times vary by region and feel a bit odd compared to other gacha games that typically reset at midnight. UTC-5 players reset at 3:00 PM. UTC+8 resets at 4:00 AM. UTC+1 resets at 9:00 PM. Planning your sessions around these windows ensures you never accidentally waste a day’s worth of refreshes by playing at the wrong time.
The daily activity system functions like a quest tracker rewarding you for spending Sanity on various content. You don’t need to complete specific tasks. Just playing the game and using Sanity naturally fills the bar toward reward thresholds including 200 Oroberyl daily. Over a month, that adds up to 6,000 premium currency just from activity points. Combined with other free sources, patient players accumulate significant pulling power without spending real money.
Protocol Space challenges consume the bulk of your daily Sanity. These instanced encounters reward materials essential for operator progression including Operational EXP for leveling, Promotion materials for breaking level caps, T-Creds for general purchases, and Skill Up resources for ability enhancement. Different Protocol Space types focus on different reward categories, so rotating runs based on current needs prevents material imbalances.
Outpost management requires visiting each regional outpost to sell accumulated goods for Stock Bills. These bills purchase upgrade materials, technology unlocks, and items that would otherwise require significant grinding or premium currency. Skipping outpost sales for even a few days creates noticeable setbacks in progression speed. Creating zipline networks between outposts dramatically reduces travel time, turning what initially takes 20 minutes into a 5-minute routine.
Ship management aboard the Dijiang mirrors outpost production on a smaller scale. Resources accumulate over time and need collection or sale to prevent overflow waste. Checking the ship daily during your outpost rotation adds maybe two minutes while providing steady supplemental income.
Operator gifts build relationships that unlock special story missions and meaningful rewards. Each operator has a daily gift cap limiting how quickly you can raise synergy levels. Gifts spawn throughout the overworld during exploration, creating natural supply without dedicated farming. Prioritize gifts for operators you actively use rather than spreading attention across your entire roster.
Depot nodes scattered across regions accept deliveries from other players in exchange for materials. The runs feel tedious early on before your zipline infrastructure exists. Once transportation networks cover major regions, depot deliveries become a quick loop taking under ten minutes. Consider deprioritizing these until your ziplines make the process efficient.
Overworld material routes provide character and weapon ascension materials that cannot be produced in your factory. These spawns have daily quantity limits that reset alongside everything else. Mapping efficient collection paths through high-density spawn areas saves significant time compared to wandering randomly hoping to stumble across what you need.
Not every activity deserves equal attention every day. When time is limited, focus on Protocol Space Sanity dumps, outpost sales for Stock Bills, and natural activity point accumulation. Complete ship management, gift distribution, and material routes when possible. Save depot deliveries for days with more available time.
For the complete breakdown of every daily activity with regional reset times and prioritization strategies, the full guide to Arknights: Endfield dailies explains how to build sustainable routines without burning out.
navigating wuling and late-game regions
Wuling hits different. After spending dozens of hours in Valley IV learning how cable routing and power management work, the game throws you into a region where everything operates on different rules. Wireless Xiranite pylons replace traditional power lines. Water sources fuel production chains for region-exclusive items. The entire factory philosophy shifts, and if you’re not prepared, the transition feels jarring.
The region unlocks after completing Valley IV’s main storyline and currently consists of two main areas: Wuling City and Jingyu Valley. The terrain is vertical in ways Valley IV never attempted. Cliffs, elevated platforms, and multi-level structures require creative zipline placement to navigate efficiently. Planning transportation infrastructure around collectible locations and resource nodes from the start prevents painful reconstruction later.

Xiranite is the signature mineral processed through the Forge of the Sky rather than traditional refiners. The ore deposits glow with a distinct blue-white color standing out against the green bamboo environment. Standard nodes appear frequently throughout both areas, but the forge has a hard cap in version 1.0 limiting how aggressively you can scale production. A technology upgrade unlocks a second forge doubling output. Holding your Wuling AIC Indices until that upgrade becomes available prevents inefficient early spending.
The critical resource bottleneck is Ferrium. Only one Ferrium deposit currently exists in Wuling, located behind Blight corruption that doesn’t clear until you progress far enough through the regional storyline. The Metastorage Transfer function at Regional Development Level 12 in Valley IV compensates for the deficiency by automatically supplementing Ferrium from your established operations. Reaching that milestone before pushing Wuling production hard prevents frustrating resource shortages.
Water bodies scattered throughout both areas aren’t just decoration. They’re functional resource points feeding into Wuling’s unique production chains. Not every body of water supports extraction. Some are purely decorative while others connect to the production system. Interacting with water sources reveals which ones you can actually use. Planning factory layouts around water access determines how efficiently you can produce region-specific goods.
Protocol Dataloggers become especially important in Wuling because each one provides technology points unlocking AIC upgrades and factory capabilities specific to the region. Missing these directly impacts how quickly you can optimize production. Wuling City dataloggers tend to sit in obvious locations near major landmarks, while Jingyu Valley hides them more aggressively behind environmental puzzles and enemy camps.
The Sky King Flats outpost unlocks after progressing through Wuling’s main storyline far enough. This outpost introduces trading options unavailable in Wuling City and opens production possibilities that define late-game regional optimization. Yazhen Syringe production becomes viable once Sky King Flats is operational, driving rapid regional development progression and making outpost completion a priority milestone.
Blight corruption blocks access to certain areas until you complete specific story missions clearing the contamination. Trying to rush exploration before dealing with Blight results in frustrating invisible walls and inaccessible zones. Cleared areas don’t respawn corruption, so once you’ve opened a zone it stays open permanently. Revisiting previously blocked locations after story progression often reveals collectibles and resources you couldn’t reach during initial exploration.
Starter blueprints for Wuling focus on getting Xiranite, Xiranite Components, and LC Wuling Batteries flowing immediately. These chains are simpler than Valley IV’s complex setups due to forge limitations. Community creator Hisae designed a quick setup that establishes basic production without worrying about optimization until your infrastructure expands.
For comprehensive location data covering every Aurylene, Protocol Datalogger, depot node, rare ore deposit, and rare growth spawn, the complete Arknights: Endfield Wuling map points you toward everything worth collecting in the region.
optimal combat rotations and team strategies
Perfect rotations define the difference between clearing difficult content and hitting walls. Arknights: Endfield’s combat system rewards precise sequencing of skills, combos, and ultimates to maximize damage during stun windows when enemies take 30% increased damage. The gap between a well-constructed team running optimized rotations and a random collection of high-tier characters is massive, often the difference between one-cycling a boss and struggling through extended fights.
The fundamental rotation principle involves building toward a burst phase rather than dealing damage constantly. Apply elemental stacks through basic attacks and skills. Trigger combos that accumulate buffs from supports and enablers. Use support ultimates to amplify damage types. Finally, unleash DPS ultimates during the stun window with all buffs active. If executed correctly, enemies die during that single window. If not, you’re stuck grinding through another rotation cycle.
Perfect rotations assume you start fights with zero energy and no pre-cast abilities. Current content lets you get away with sloppy play, but difficult endgame challenges enforce these restrictions. Learning proper rotations now builds habits that pay off when content actually demands them rather than scrambling to develop new muscle memory under pressure.
Electro rotations begin with Perlica applying electrification through basic attacks. Switch to Arkite and use her skill to generate initial SP while the debuff is active. Her combo triggers automatically providing team damage buffs. Switch to Abiwena and begin her spear cycle through basic attacks into skill, planting spears in the electrified target. When the enemy staggers, activate Gilberta’s ultimate for the damage amplification zone, use Perlica’s ultimate for its high scaling burst, then trigger Abiwena’s skill to recall all spears simultaneously. The entire sequence flows naturally once practiced.
Fire rotations open with Wolfgart applying fire stacks rapidly through basic attacks and his skill. Switch to Akuri for additional fire application while generating SP. Switch to Ardelia and trigger her combo to apply corrosion, which automatically grants Laevatain a fire stack. With four stacks accumulated, switch to Laevatain and activate her empowered skill. The spiritual sword ultimate summons a massive blade that attacks repeatedly, devastating grouped enemies during the stun window.
Ice rotations vary depending on whether you build around Yvonne or Last Right. The Yvonne variant focuses on sustained single-target damage through extended ultimate uptime. Begin with Shai applying ice stacks while providing healing coverage. Use Alesh to freeze the iced target while generating SP. Activate Shai’s ultimate for ice damage amplification, then trigger Yvonne’s ultimate while the target remains frozen and all buffs are active.
The Last Right variant trades sustained damage for burst windows with even higher peak output. Her combo requires three ice stacks on enemies, which Florit’s combo applies when enemies already have two. Start with Last Right applying stacks through basic attacks and skill. When Florit’s combo triggers the third stack, execute Last Right’s combo for massive damage and ice susceptibility application. During the stun window, activate Shai’s ultimate for amplification, use Florit’s ultimate for damage and another ice stack, then unleash Last Right’s ultimate hitting three times with full buff stacking.
Physical rotations center on the vulnerability and crush mechanics. Open with Chen applying vulnerability stacks through her skill and combo. If running freeze enablers like Stella, freeze the target and break it for physical susceptibility plus another vulnerability stack. Switch to the Endmin and activate his skill to consume stacks with crush for massive damage. Build crystals through his combo while regenerating abilities for ultimate consumption during the stun window.
Energy regeneration requirements vary significantly between team compositions. Some setups require specific weapons providing energy stats to charge ultimates consistently. Akuri needs the Fort Breaker sword after the beta-to-release cost increase on her ultimate. Sacrificing damage-focused gear for energy regeneration pieces is sometimes necessary to make rotations actually function.
Understanding these rotations reveals why certain characters receive tier list placements that seem counterintuitive at first glance. Batteries and enablers don’t look impressive in isolation but enable damage multipliers that snowball during optimized play. Investing in a complete team composition outperforms chasing individual high-tier DPS characters without supporting infrastructure.
For step-by-step breakdowns covering every elemental composition with detailed sequencing instructions, the complete guide to Arknights: Endfield best teams and rotations explains exactly how to maximize your squad’s damage potential.
your journey on talos-II starts now
Arknights: Endfield asks more from players than most gacha games. The factory system alone would justify a standalone title. Combat rotations demand understanding rather than button mashing. Daily activities spread across enough systems that efficient routines require actual planning. The depth is real, and so is the satisfaction when everything clicks into place.
The progression path becomes clearer once you understand how each system feeds into the others. Codes and login rewards provide starting resources. Factory output generates passive income and crafting materials. Strong teams clear content that unlocks new regions and challenges. Daily routines maintain steady growth without requiring marathon sessions. Late-game regions introduce new mechanics that reward the foundations you’ve built. Optimized rotations turn good teams into dominant ones capable of trivializing content that previously felt impossible.
New players should focus on establishing fundamentals before chasing optimization. Redeem every available code immediately since expiration dates wait for no one. Build basic factory chains for Originium Crust and green batteries before attempting complex production. Pick one elemental team and invest deeply rather than spreading resources thin. Learn your daily reset time and build habits around consistent engagement. Let Valley IV teach you the systems before rushing toward Wuling’s complications.
Returning players from the beta will find familiar mechanics with meaningful refinements. Energy costs changed on several operators, affecting rotation viability and gear requirements. Factory blueprints from testing phases may need adjustment for release version balance. New operators shifted tier list rankings and team composition priorities. The core experience remains recognizable while the details reward fresh attention.
The community resources available for Endfield continue expanding as players discover optimizations and share solutions. Blueprint import codes compress factory learning curves. Rotation videos demonstrate timing that text descriptions struggle to convey. Interactive maps pinpoint collectibles that would otherwise require tedious exploration. Leveraging these resources accelerates progression without diminishing the satisfaction of building something that works.
Hypergryph built a game with genuine depth beneath its gacha exterior. The factory automation appeals to players who never expected to enjoy logistics puzzles. The combat system rewards skill expression beyond simply pulling stronger characters. The world design encourages exploration rather than treating the open environment as empty space between objectives. Whether any of this matters to you depends on what you’re looking for, but the ambition is undeniable.
Your account will grow steadily if you engage with the systems consistently. Perfect optimization isn’t required for progression. Understanding the basics and showing up regularly accomplishes more than sporadic bursts of intense play followed by extended breaks. The players who thrive in Endfield are the ones who find sustainable rhythms rather than burning out chasing maximum efficiency.
For immediate value that benefits every account regardless of progression stage, start with the complete list of active Arknights: Endfield codes and claim your free rewards before any more promotions expire. Those resources compound into meaningful advantages that make everything else in this guide easier to accomplish.
